
Usage
Available systems
The following JupyterHub systems are currently operated,
- https://cloudlab-ss22-01.rz.uni-kiel.de/
- https://cloudlab-ss22-02.rz.uni-kiel.de/
- https://cloudlab-ss22-03.rz.uni-kiel.de/
- https://cloudlab01.geomar.de/
Each teacher will be informed about how to access the system for their course by the Cloudlab system administrator. Students will be informed about how to get access by their course teacher.
User accounts
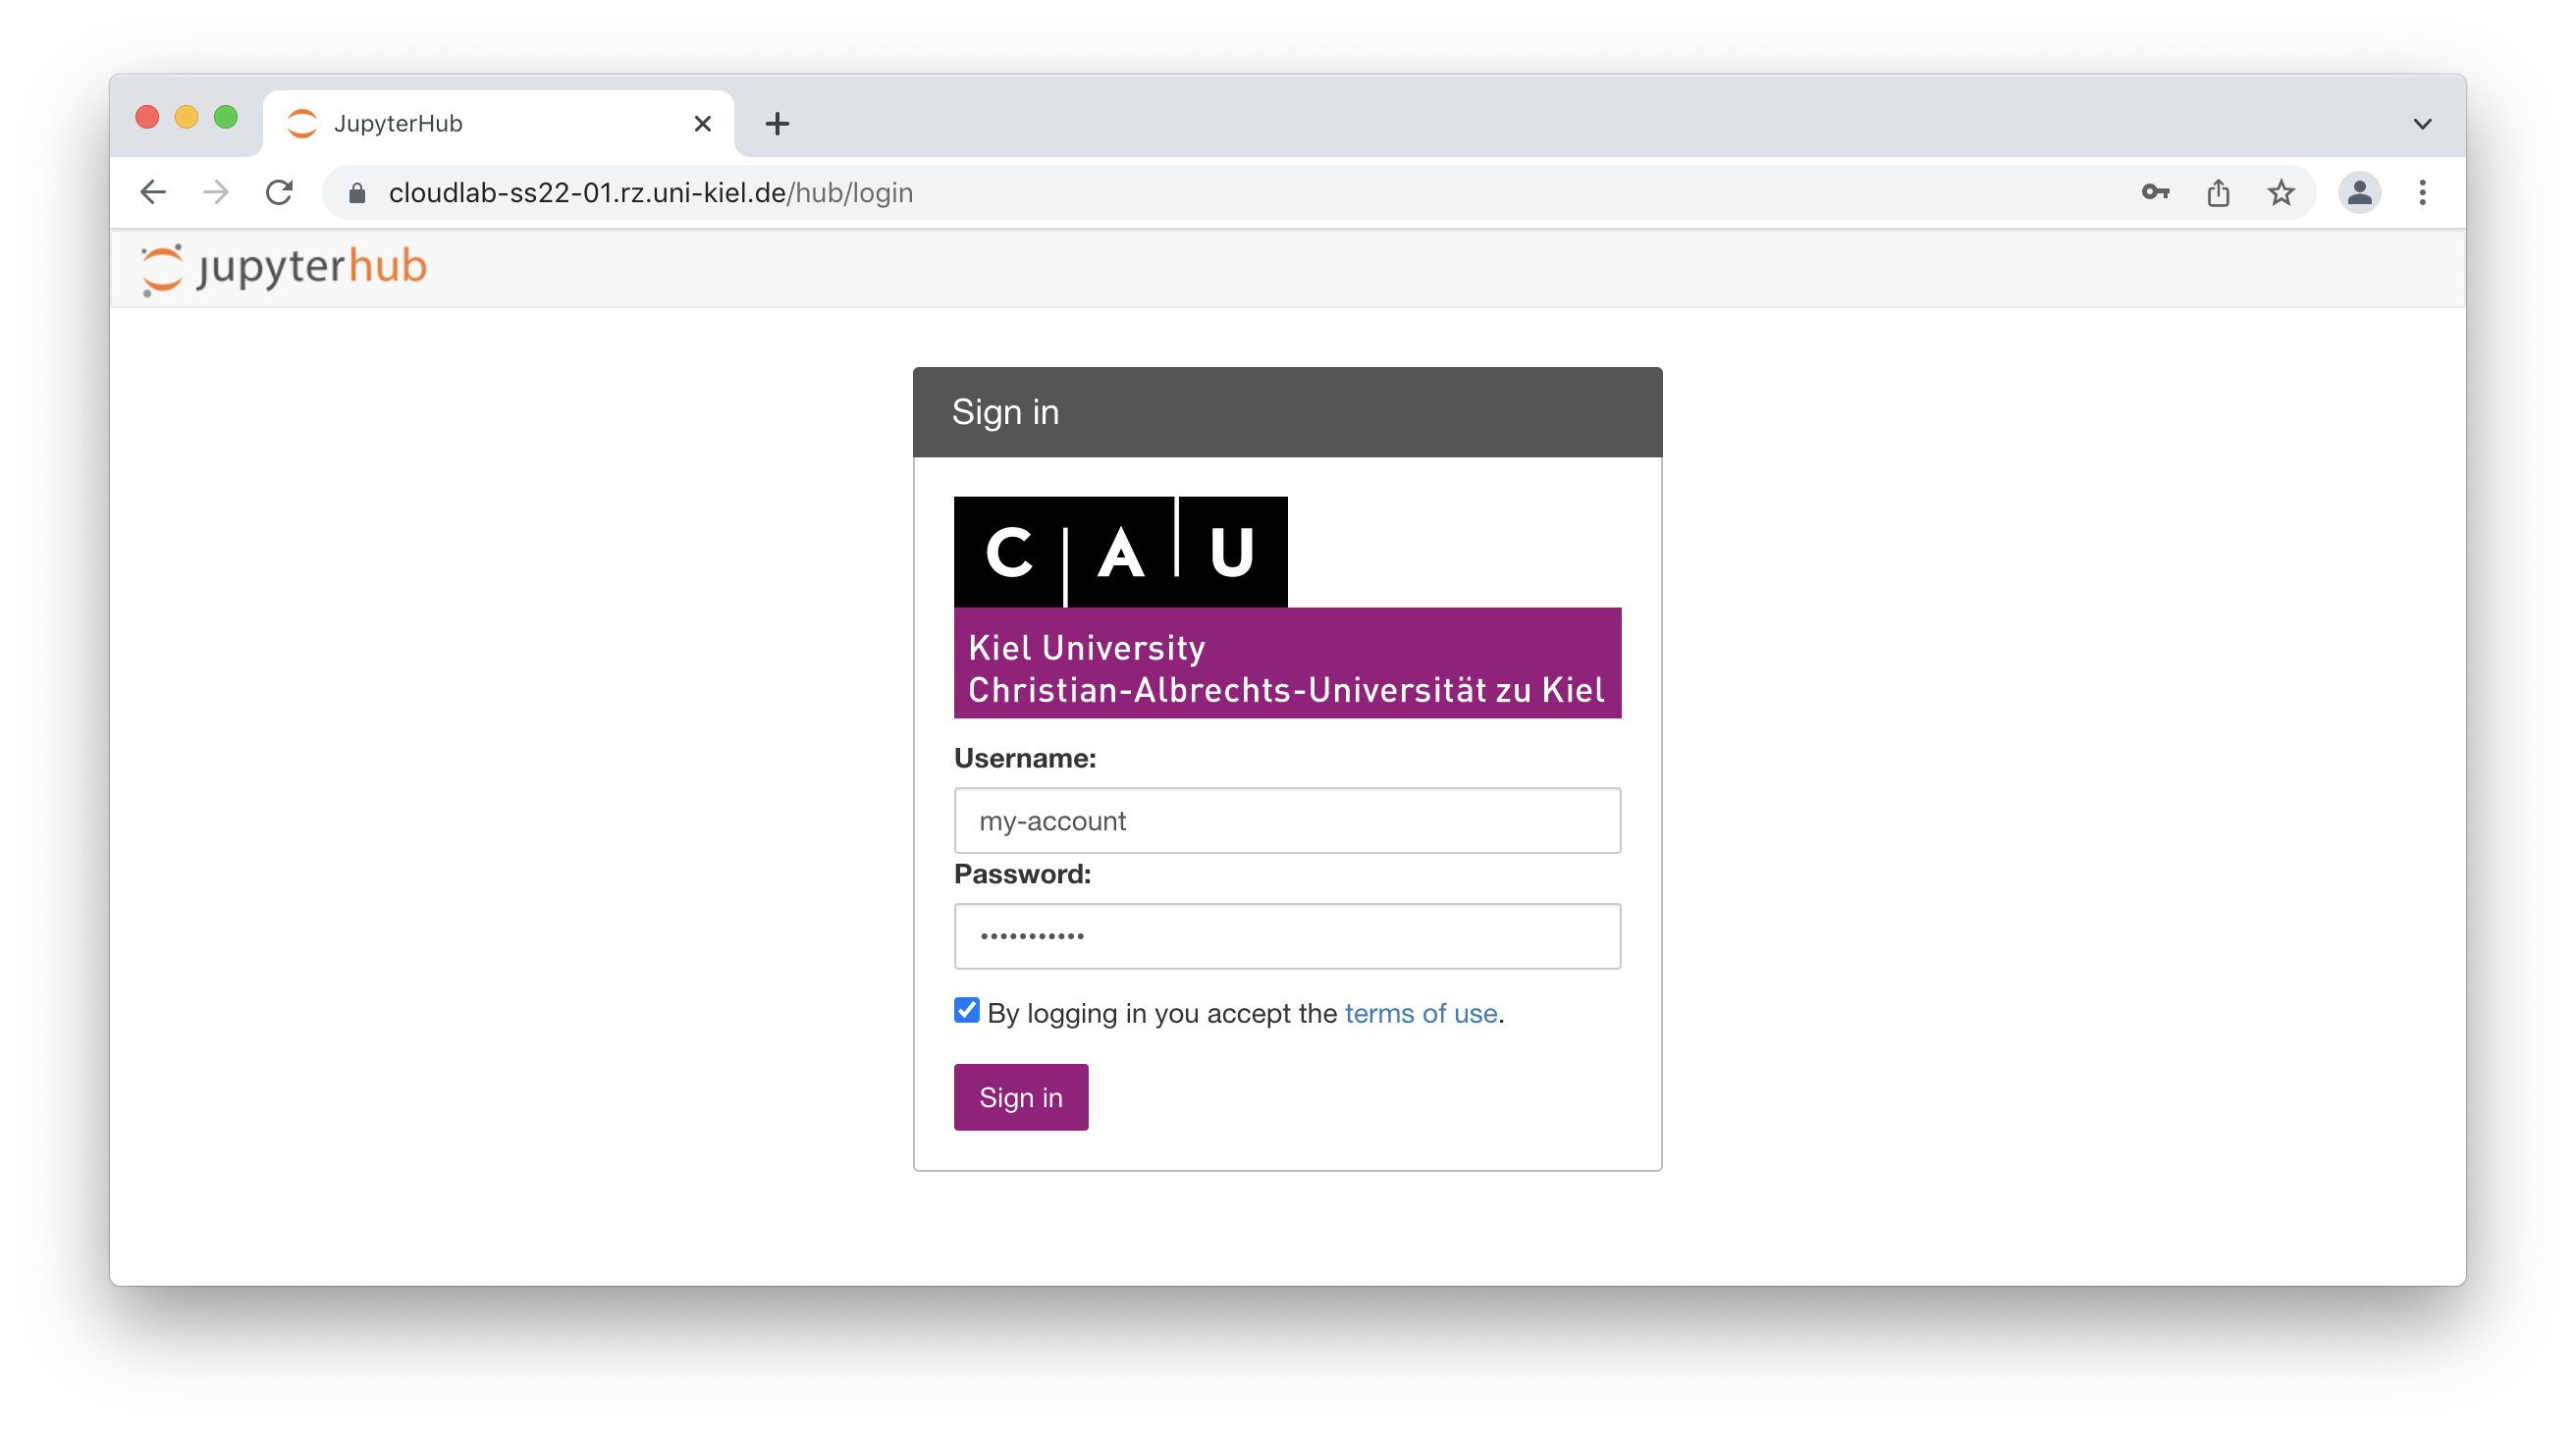
Teachers get unique accounts for each JupyterHub system. Students will get unique accounts for each module. These accounts are currently prepared manually by the Cloudlab team. Teachers get their account information from the Cloudlab system administrator. Student accounts are assigned by the course teacher. The student account password is currently set upon first login. Simply type the account name and a password into the login form as shown below, then click the “Sign In”-button.
Password management
Please note that passwords are not stored in a readable or retrievable form on the system. If you are logged in, you may change your password via the “Change Password” menu item on the JupyterHub control panel. If you are logged out and can’t remember your password, please have a look at the contact page for details about how to request technical support.
Course materials
Every user has a separate home directory to which only the user itself has access. Within this home directory, users will find a link to the global course materials folder. The folders available in the course material folder reflect the UnivIS module names of each of the courses.
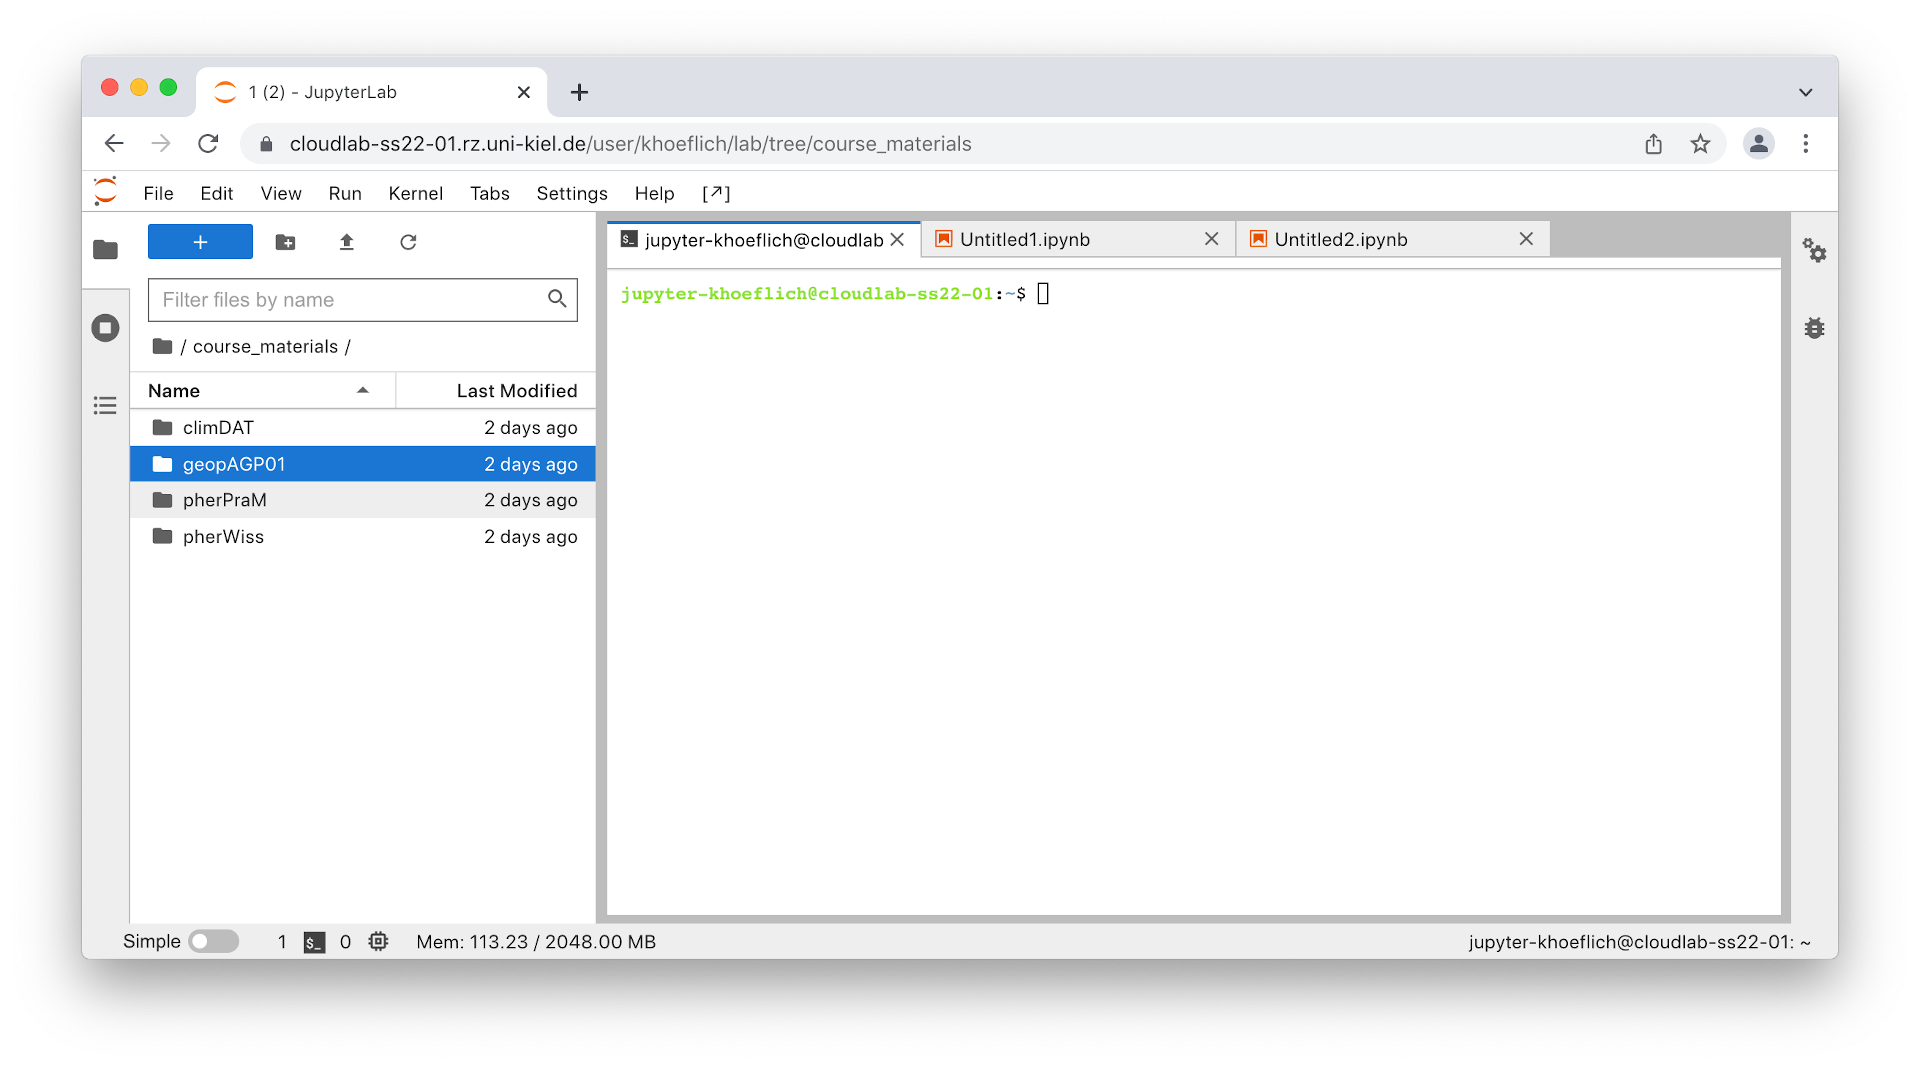
Currently, per default, course material folders are writable only by a course’s teachers, but readable by all users that share a JupyterHub system. As a student, if you want to work on files that are located in the course material folder, first place a copy of them in your home directory!
For teachers
Folder permissions are set by the JupyterHub system administrator during the setup of a course. If you have more complex than the default folder demands, e.g. course materials should be visible only to the students of your own course, or if you need shared folders for a certain group of students, please have a look at the contact page for details about how to contact the Cloudlab support.
Note, expecially if you are preparing course materials as a group, make sure that the published course material is group-owned, else other teachers might not be able to edit the files, even though they have writing permissions on the folder. Also make sure, that you never attempt to work on the same file at the same time. The group-ownership of material which is owned by yourself in the course materials folder can be “corrected” by using the following commands from a terminal session,
$ chown -R :[COURSE_ID_HERE] /course_materials/[COURSE_ID_HERE]/*
$ chown -R :[COURSE_ID_HERE] /course_materials/[COURSE_ID_HERE]/.[^.]* # for hidden folders/files
Note, if you prepare and publish course material alone, you do not need to take special care.
Compute environments
Each course on a system has its own compute environment, which contains all software necessary to work on the course materials.
The environments are named after the UnivIS module names.
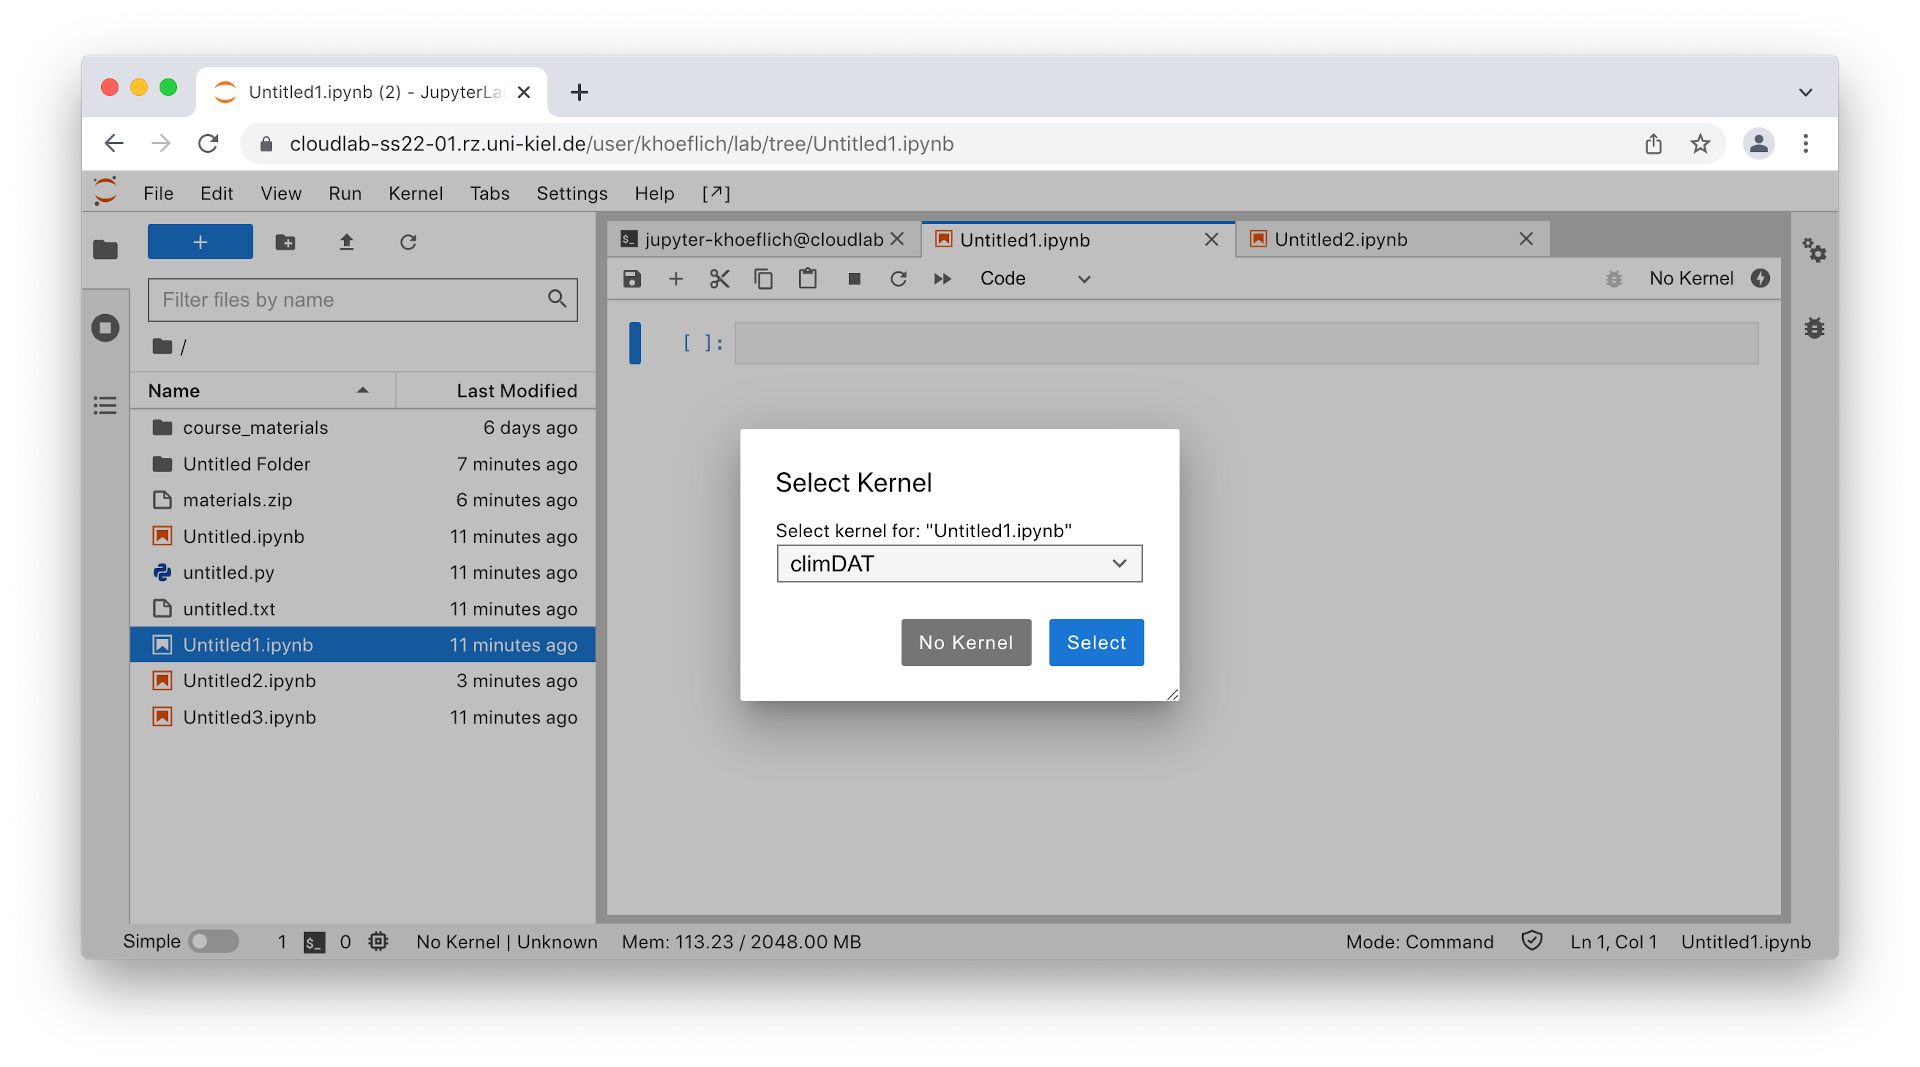
To select the desired environment for a Jupyter notebook, go to the menu bar item Kernel > Change Kernel... or to the Switch kernel shortcut in the upper right corner of the Jupyter notebook.
From the Select Kernel window and its drop-down menu, select the kernel that contains the correct UnivIS module name, e.g. climDAT.
Then, save the Jupyter notebook to make the chosen kernel the default Jupyter kernel for this particular notebook.
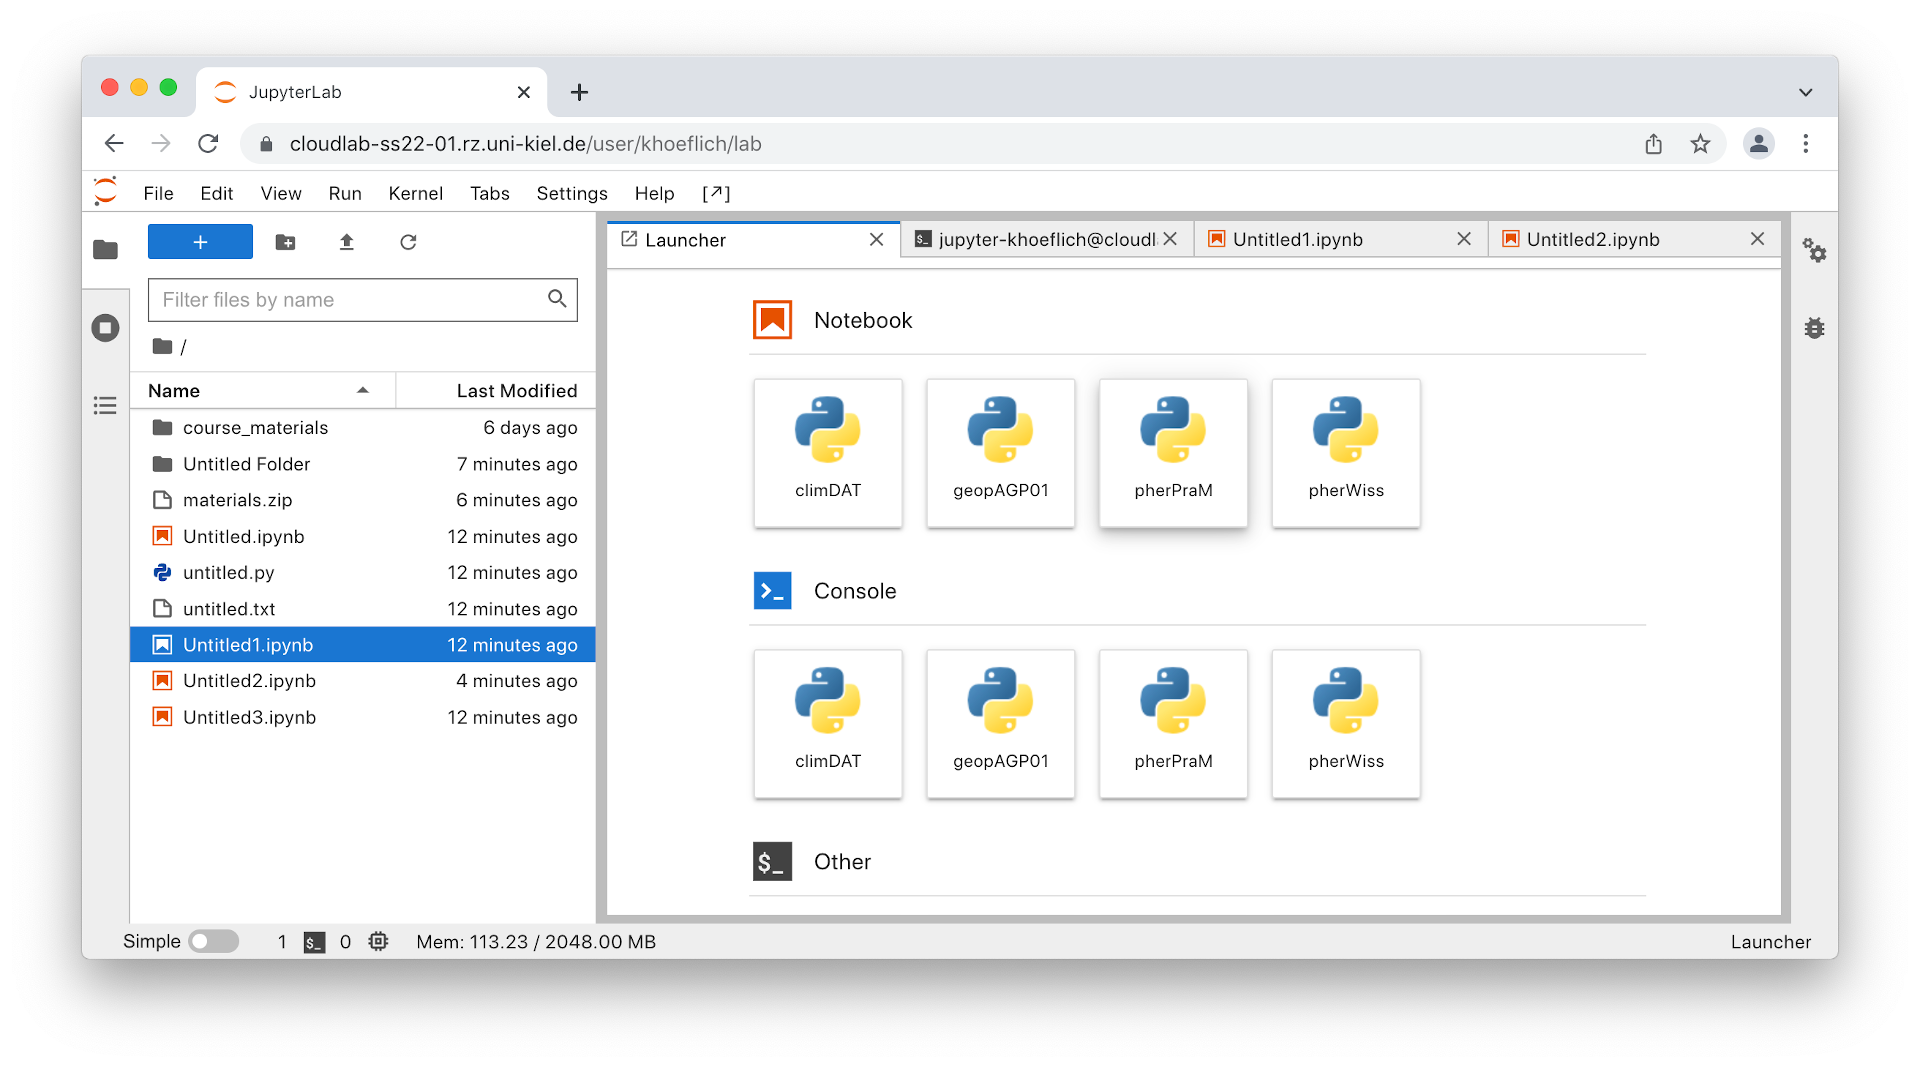
You may also open a new Jupyter notebook with a particular software enviroment via the JupyterLab launcher tab. Simply click onto one of the Jupyter kernel launcher buttons.
For teachers
If your course’s software environment misses packages that are required to work on the materials, or if you need package versions that differ from existing ones, please have a look at the contact page for details about how contact the Cloudlab support.
Migrating your material
The JupyterLab file browser can be used to upload and download materials.
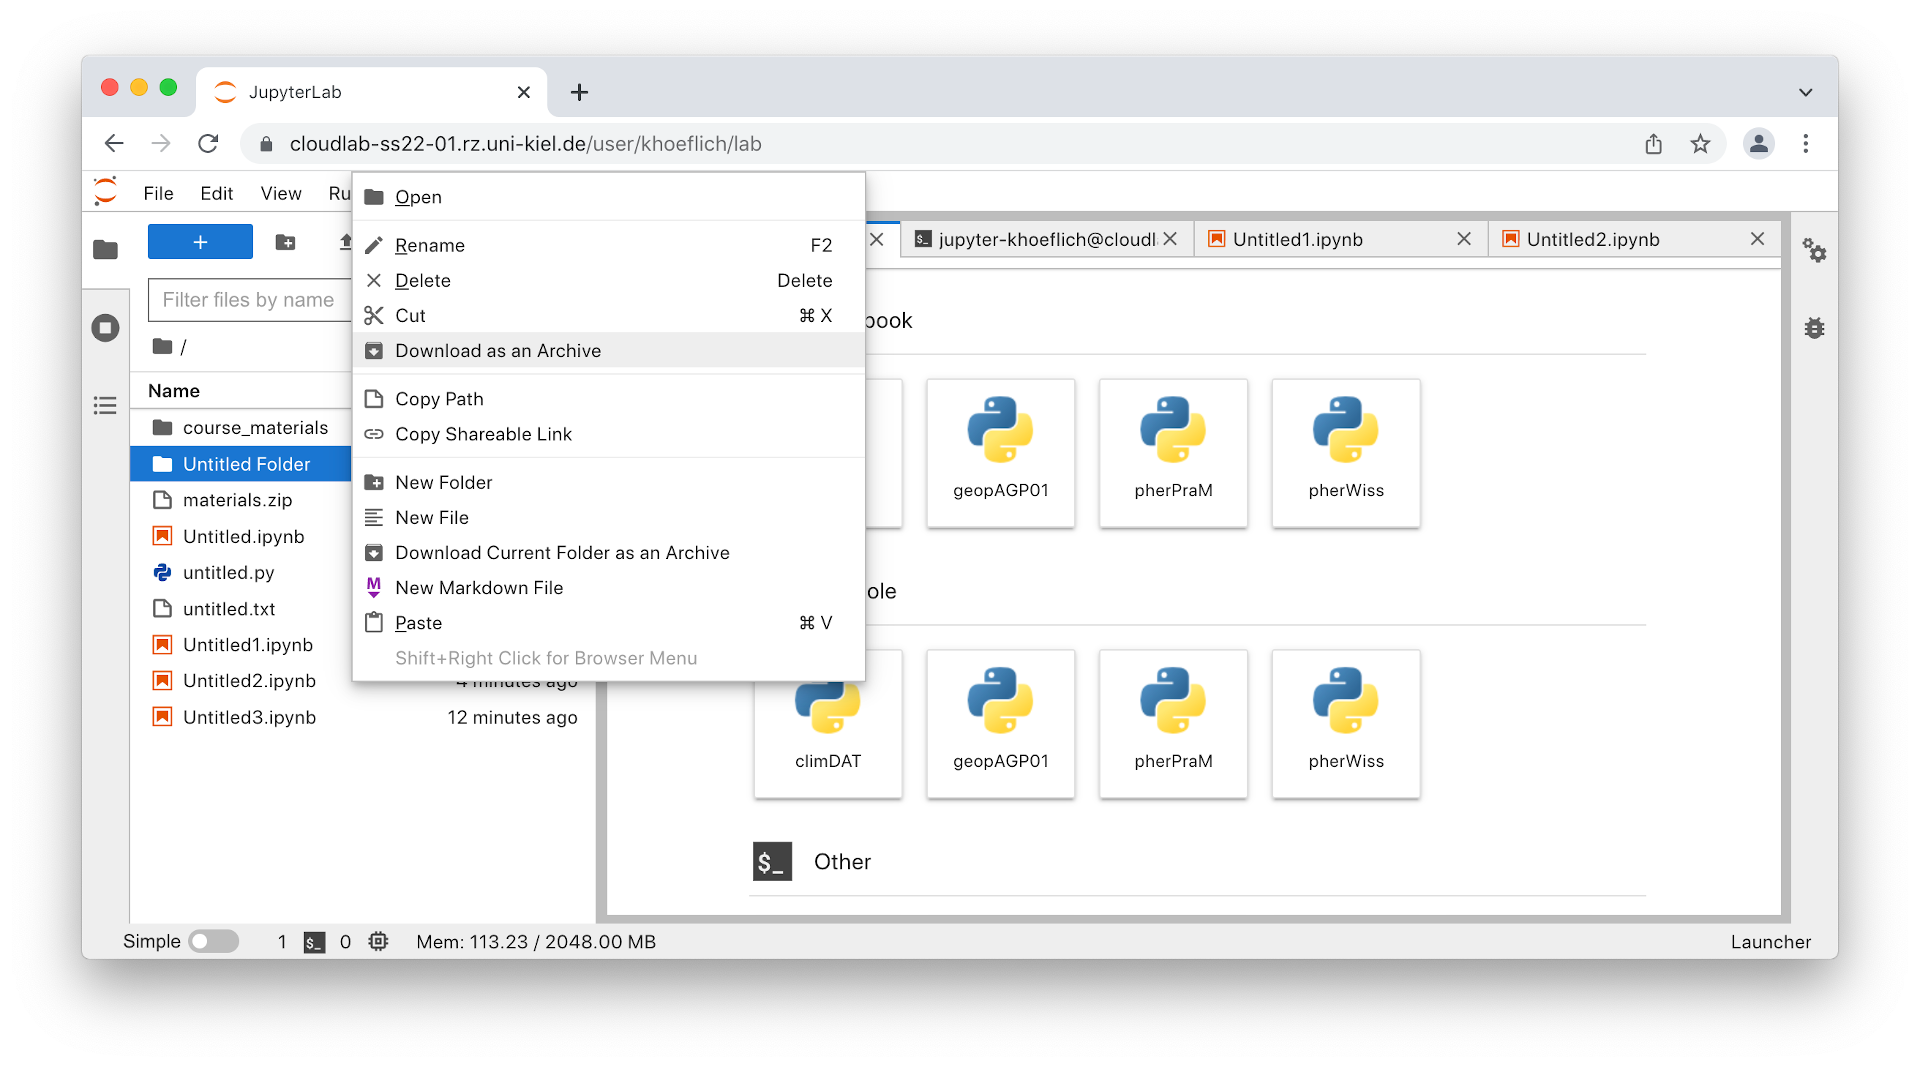
To downlad material right-click on a file and select Download.
To download a folder, choose the Download as an Archive option.
The files will be downloaded as a ZIP archive.
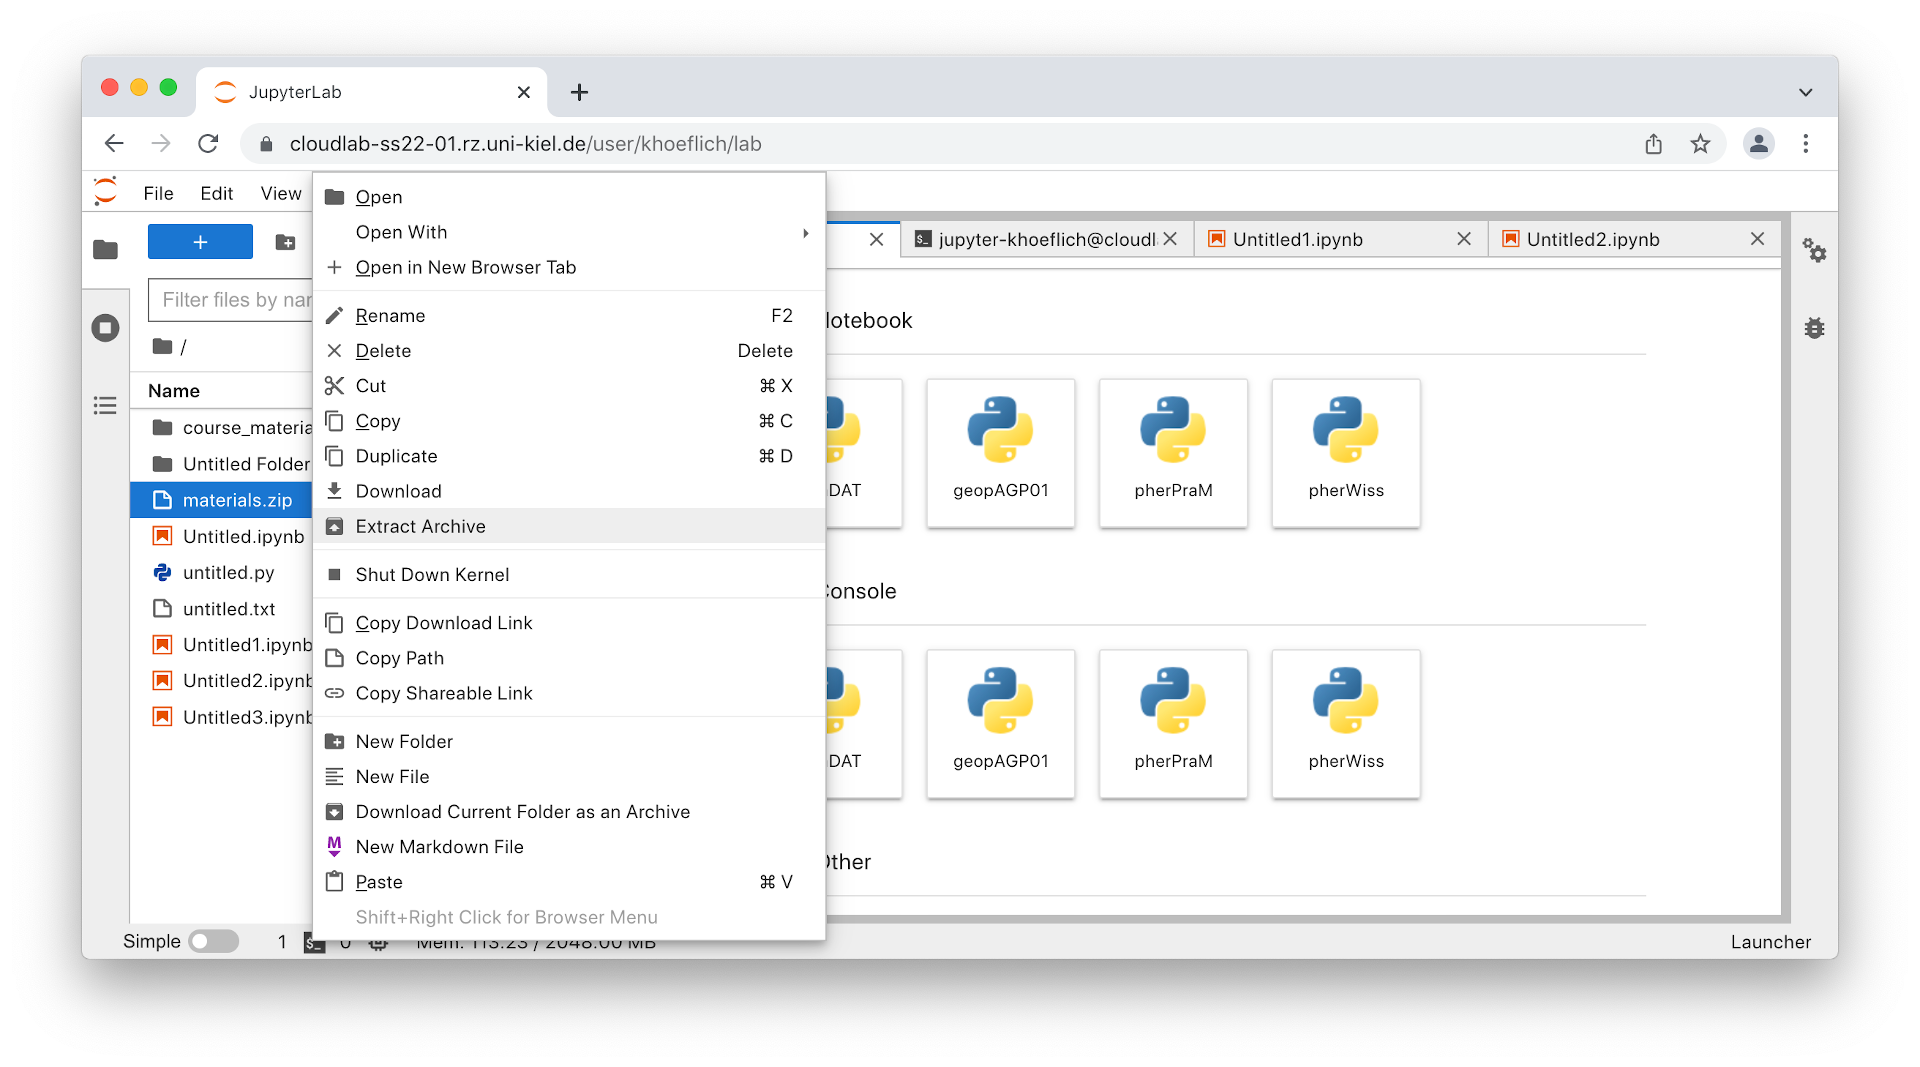
To upload material, simply drag-and-drop a file from your computer into the JupyterLab file browser.
To upload a folder from you computer, you first have to collect your files in a ZIP archive.
After uploading the ZIP file you can right-click on the archive and select Extract Archive to extract its contents.
Click the Refresh File List button to update the file browser view, and to access your files.
Session defaults
Currently, your session’s computing resources are limited to 1 CPU and 2 GB of memory.
While working on the system, each Jupyter notebook, interactive console, and terminal will consume parts of these resources.
If you run out of memory, please consider closing Jupyter kernels, as well as terminal sessions, that you do not longer need.
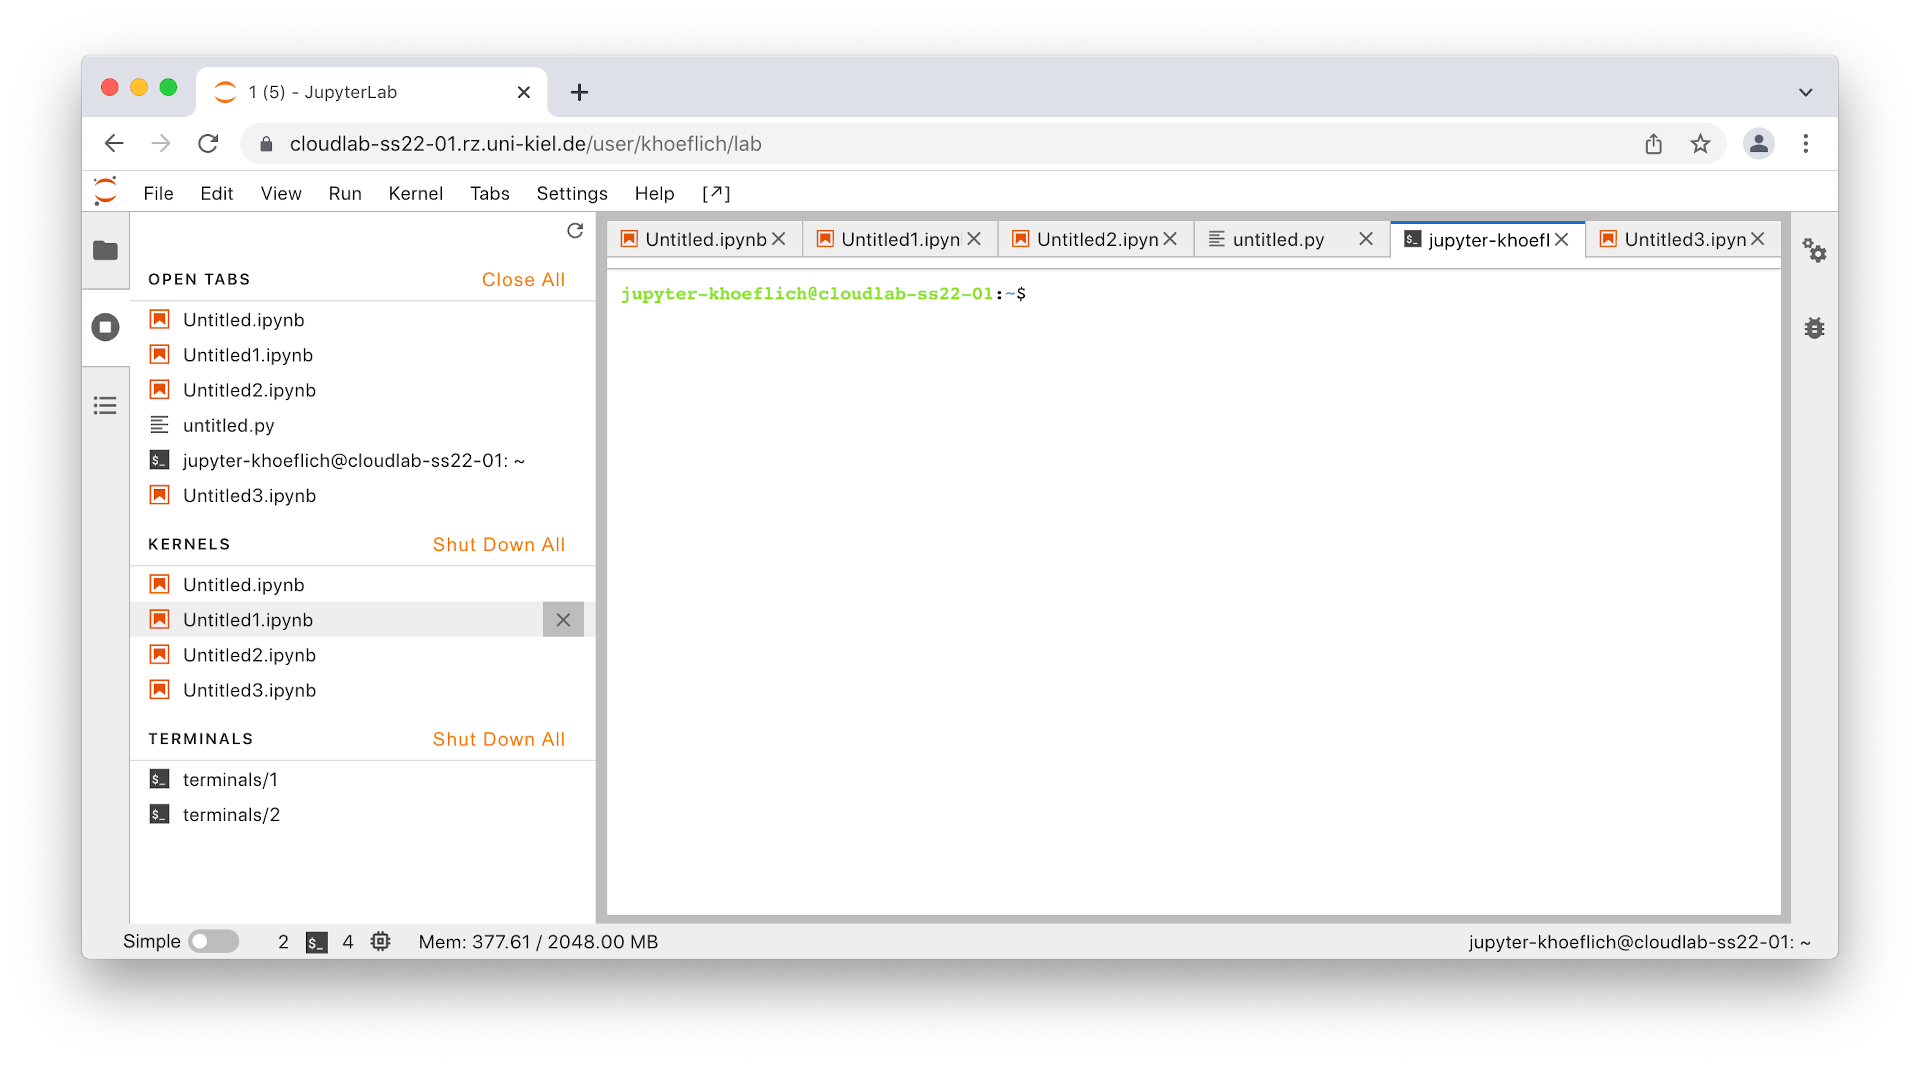
You can get an overview about running JupyterLab processes via the Running Terminals and Kernels tab in the sidebar.
You can shutdown all, or only single processes.
Please note, if you are running out of memory while you are working on the material of a single exercise only, please contact your course teacher about it. They may get into contact with the Cloudlab support in order to request an increase of the computing resource limits for the course.
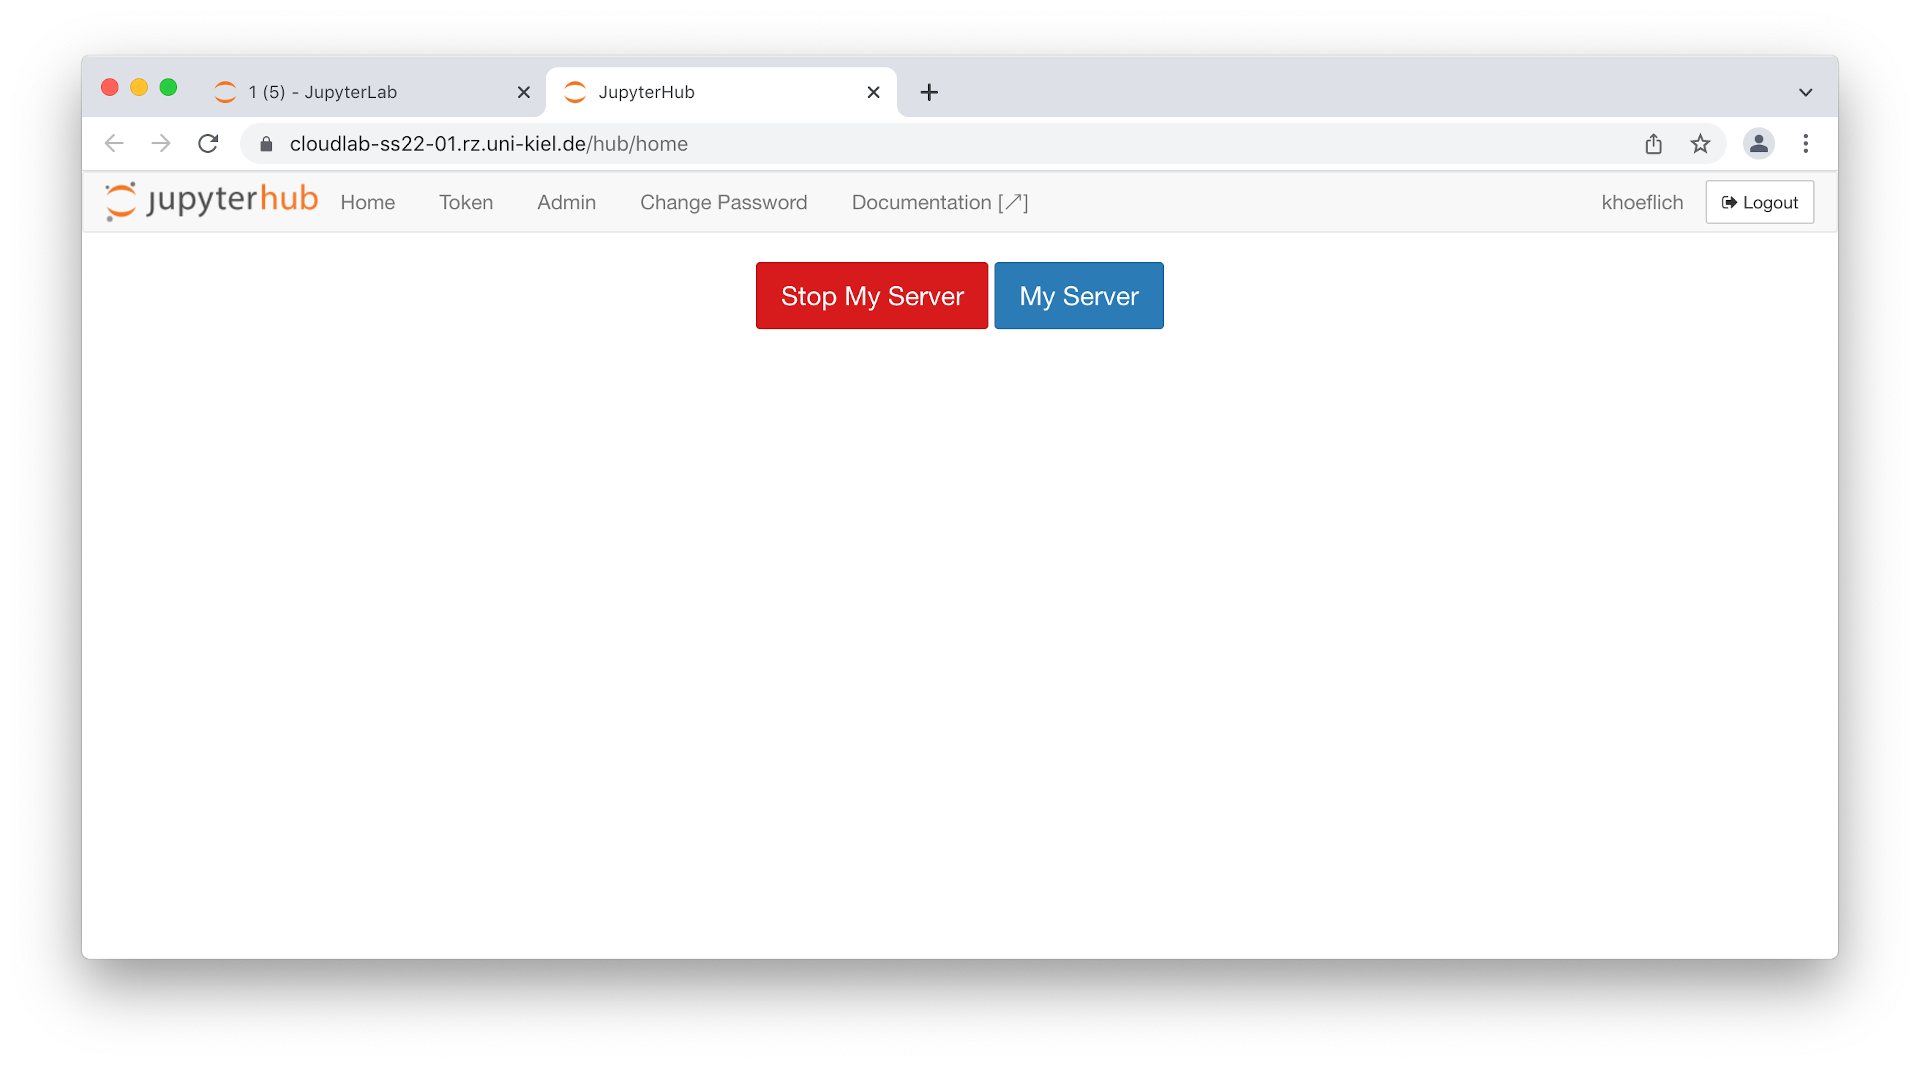
Note, that your session length on the Cloudlab system is not restricted, but that you server is automatically shutdown after 2 hours if no activity occurs. Generally, make sure to stop your server manually via the JupyterHub control panel after you are done with your work, in order to free computing resources for other users. Thank you!
Terms of use
If you use Cloudlab, please make sure you have read and understood the terms of use.
Last page update: June 28th, 2022